My Momma always taught me that New Year's Day was the one magical day a year that you needed to eat two particular foods to secure luck and money for the next year. Black-eyed peas for luck and cabbage for cash. These foods were a MUST for the first day of the year and I have carried on the tradition/superstition for as long as I can remember. (I've been pretty blessed with luck. The cash doesn't feel like its been around as much, but then again we've always managed to get by which is more than some people can say, so I'd better not break with tradition.)
Last year was the first married New Year's Day for my husband and I, so I was sure to eat lots of these two magical foods. Last year we cooked smoked sausage and mixed in sauerkraut and black-eyed peas for a simple New Year's dinner. This year, I decided to kick it up a notch with something a little more time-intensive. I read a recipe for sauerkraut pierogies online. I've always wanted to learn how to make pierogis, but I had never thought to put sauerkraut in them. Once I made this discovery it was easy to add in black-eyed peas to make this a New Year's Day kind of a thing.
So, I took the recipe and made it my own. I added in spices and other ingredients that weren't part of the recipe. I questioned whether or not it was going to work at all. I stumbled my way through and after about 2 hours, I had something great to show for it! I honestly don't think it would take that long if I had known what I was doing or had felt more confident in what I was doing, so don't let that time frame scare you off from these. I definitely plan to make pierogies again because you have a lot of room for variation....these little guys are very versatile! I might even make this same thing next year...then again, I may try something new...who knows?! Either way, these were tasty, so here's how I did it for those that want to try it for themselves!
I had fun filling pierogies! My husband had fun watching...and less fun doing the dishes!
I don't usually structure my posts this way, but due to the number of steps, I'll go ahead and list the ingredients first. The original recipe yields 4 dozen, so I cut it in half, which is why some of the measurements seem wonky. Keep in mind that I adapted this from another recipe, so it's totally fine for you to not follow it to the letter if you chose to mix it up!
Dough Ingredients: 1&1/2 cup flower, 1/2 tsp salt, 1 egg, 1/8 cup sour cream, and about 3/8 cup water.
Filling Ingredients: 1/2 lb red potatoes (I used one big one and one small one.), 1 Tbsp sour cream, 1/8 tsp salt, 1/3-1/2 can sauerkraut, 1 cup shredded cheddar cheese, 1/2 can black-eyed peas (drained), paprika and garlic powder to taste.
Searing Ingredients: 1/4 white onion sliced in strips (The recipe called for a small yellow onion, but I just used the last of one that I had.) and 1&1/2 Tbsp of butter (I may or may not have used more than this...)
Phase I: You Knead to Make Dough
 |
My husband and my dough hook.
What more does a girl need? |
Okay, down to business. You start with making the dough first because it needs a little time to rest before you roll it out. Whisk your flour and salt together in a stand mixer. In a separate bowl, whisk your egg, sour cream, and water together until you get a pretty consistent yellow, then pour that over your flour/salt mix. You can whisk this for a few seconds like I did (ignoring the fact that it says to mix it by hand) or you can use a wooden spoon like you are supposed to do to get these ingredients mixed in with one another. Your choice. Either way, mix until what the recipe called a "shaggy dough" is formed. Once it started looking dough-like, I pulled the beater, scraped it and the bowl with a plastic spoon, and gave it a quick stir to get it all mixed in. Next, I broke out my trusty dough hook and let it go to town for about five minutes. (The recipe said you could knead it by hand for eight minutes, but why do that if you don't have to?!) It looked a bit sticky, so I added some flour as it was going, but be careful not to do too much! It should eventually form a smooth wet-looking ball that may or may not stick to the bottom of the bowl just a touch. (Airicca says that this was just a factor of my dough hook not setting as low as some other stand mixers.) Remove the dough hook, loosely cover the bowl, and set aside to rest until you are finished with the filling and ready to roll (literally).
*~*Dough-making lesson*~*
My amazing roommate worked as a baker and knows all this cool stuff about making dough. It turns out that the reason we knead bread at all is to develop strands of gluten. Stronger gluten = tougher dough, so sometimes you need more kneading and sometimes you need less kneading depending on what you are going to use the dough to make. She also says that chefs always want to add four to dough, but in reality, you usually need more water than you think. The moral of the story is that you have to be careful! Don't get too flour-happy even if it seems like the dough "needs it" because it looks "sticky". This may take time to work out if you aren't lucky enough to have a baker living with you, but just follow the recipe minding your flour additions and you should do just fine! :)
*~*End of Lesson*~*
Phase II: Potatoes are Filling
The next phase of operation pierogi was to work on the filling. Pierogies are traditionally stuffed with potatoes and these babies were no different. Start by washing your potatoes and boiling them. The recipe said to do this whole, but I cut mine into chunks so that they would cook faster. The nice thing is that they cook quickly anyway because you are only boiling a small amount as opposed to what I'm used to doing for mashed potatoes or potato soup. While the potatoes cooked, I got my dough area ready by flouring the surface of my roommate's wood block (affectionately called "the beast") as well as my wooden rolling pin. I also pulled out two cookie sheets and lined them with parchment paper. This is also a good time to cut your onion up into strips and set aside if you want to get ahead of the game.
Once the potatoes are tender (can be effortlessly smashed with a fork), drain them and proceed to mash them with either a potato masher or, if you are like me, with your trusty immersion blender. Add in salt, paprika, garlic powder, and sour cream when potatoes look half-mashed and then continue mashing. Next, add in your cheese, sauerkraut, and black-eyed peas and mix with a spoon as you don't want to blend up your peas and sauerkraut. The recipe called to pre-shape the filling into balls and set them aside, but mine was so sticky, that there was just no way that it was going to work for me, so I just left them in the saucepan until I was ready to fill.
 |
| It tasted better than it looks, I promise! |
 |
Lame rap lyric spoofs aside,
here's the dough before rolling out. |
Phase III: Roll Out! Roll Out! (I'm Makin' Pierogies...You Can't Stop That!)
Time for the fun part! I scraped my dough out onto the floured surface and rolled it out. My dough tried to shrink back as I was rolling, so I let it sit for about five minutes and did a little clean up to give it a little extra time to develop. After that, it was easy to roll the dough out to about 1/8" thick. This was supposed to make two dozen and I wasn't sure how looking at my sheet of dough, so I rolled it just a bit thinner (which worked out perfectly). Use your best judgement keeping in mind that the leftover bits will be rerolled and will yield more than you realize (if you are me). In the end, I made exactly 24 pierogies with only a tiny sliver of dough left behind. I was impressed because I was SURE that it wouldn't make that many after the first time rolling it out, but I was wrong! I digress. Moving on! The recipe called for a 3" biscuit cutter, but I just lightly floured the mouth of a wide drinking glass with about the same diameter because that's what I had. It worked just fine! :p I laid the dough rounds out on my parchment paper-lined baking sheets and washed my hands for the next phase.
 |
| Here I've rolled out the dough and cut a few rounds. |
 |
Here's all 2 dozen rounds. Perfect number even
if they aren't all perfectly round after moving
from the beast to the sheets! |
Phase IV: Fill' Er Up!
This next step got...sticky. Until my super-intelligent husband reminded
me that putting a little olive oil on my fingers would keep the filling
from sticking as badly so I didn't have to wash my hands between each
pierogi! (I'm a lucky woman to have a man with looks, personality,
and brains!)
First, I filled a large pot with water, sprinkled in some salt, and set it to boil. To make the pierogies themselves, I started off holding a round of dough in one hand, filling with the other, then folding the dough in half over the filling, and finally crimping the ends together. This would have been a lot easier if the filling wasn't so sticky! After doing a few that way, I decided to streamline it a little better an dabbed filling on each round until I was out of filling. A few of them got a little more full than they probably should have been, but hey, I didn't want to waste anything! After that and the olive oil trick, folding and crimping went MUCH faster and I had dumplings ready to go in no time!
First attempts at filling, folding, and sealing were a bit slow...
 |
| A lonely little pierogi... |
Learned to work smarter...not harder...(Much less lonely pierogies!)
Phase V: Boil, Boil, No Toil, No Trouble
This was one of the easiest parts of the whole process. With my first batch of pierogies filled, sealed, and waiting, it was easy
simply toss them in the boiling water and wait. Actually, I didn't wait, I finished filling and sealing the second dozen while the first dozen cooked, but I'm a multitasker, so you do it however you want to do it! The recipe said not to boil more than 10 at a time, but since I was only making 24, it seemed silly not to add 12 at a time....there was plenty of room. After you get all 12 in the pot, you need to run a slotted spoon around the bottoms of your dumplings to make sure that they aren't sticking to the bottom or to one another. They will sink to the bottom immediately when you add them to the water. When they float to the top, they are basically finished. The recipe says 8-10 minutes of boiling usually does this, but mine were finished in about 5-6 minutes. I let my cook another minute or so after floating up until all 12 were floating. Then, you need to pull them out with a slotted spoon and put them back onto your parchment paper-lined sheets. Don't stack them so that they won't stick together and you may want to turn them while the other batch is going so that they don't get too soggy from sitting in water if you didn't get them fully drained after you rescued them. While that last set is boiling, you can start on the next phase.
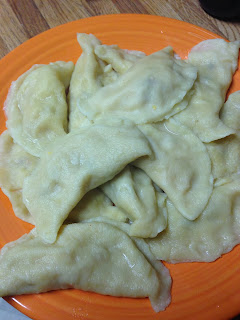

Happily boiled pierogies straight from the pot and lined up for searing.
Phase VI: Sear Those Suckers!
In the biggest skillet you own, you want to melt the butter and toss in your onion strips. Stir the strips to coat them in the butter and gather them in the center of the skillet for a minute or so to get a little brown. Next, scatter the strips to the edges of the skillet and toss in 6-8 pierogies. (More if you have a massive skillet!)
Sear the pierogies on both sides getting them nice and crispy with golden-brown splotches all over. Remove them to a plate lined with paper towels for draining. Add butter as needed and continue adding batches of pierogies until you get them all seared. If it looks like the onions are getting on the far side of well-done, you can remove them as I did. If you have enough onion, you could actually do 2-3 new batches of onion in between your batches of pierogies if you wanted.
Cooking onions in butter and then pan searing these puppies smelled amazing!
 |
| Mmm...pierogies! |
Phase VII: Challenge Complete. Enjoy your Pierogies!
Now that you have finished, you can eat to your heart's delight! My husband was sad that there was no dipping sauce...I think he was thinking about Asian dumplings...but he seemed to enjoy them all the same! I liked them a lot, but I could see a lot of room for adapting it to make them more flavorful as they were a tad on the bland side. (Which isn't always a bad thing...I like some foods to be "bland" because they still taste great even without a lot of spice!) The recipe I used added that you can use leftover mashed potatoes instead of having to essentially make mashed potatoes. (But seriously, who
ever has
leftover mashed potatoes?! Those disappear super fast in this house!)
They also mentioned that you can freeze these bad boys before you cook them if you want to make a big batch and save some for a quick meal down the road.
Again, I know this seems like a lot of work, but it really wasn't too bad. It also would have gone quicker if I wouldn't have doubled-checked everything 3 or 4 times or if I wouldn't have kept deviating from the recipe...but in the end they came out really great so I suppose it's a good thing that I did! I hope you take the time to make and enjoy these yummy little pockets of luck and cash even if it isn't New Year's Day anymore! Happy Eating! :D


.jpg)


